6 facial masks that help you get rid of unwanted facial hair

  1. Face mask with turmeric
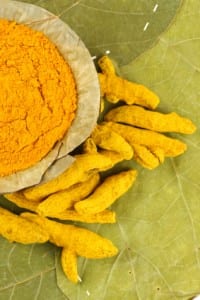
Turmeric is an Indian spice without taste or smell, used not only in food but also in beauty treatments. Turmeric slows hair growth, which is why Indian women use it frequently to remove facial hair. This spice is found in herbal or bio stores. How to prepare the mask? Mix the turmeric powder with water until you get a paste, apply it on the areas with hair and let it dry. After drying, remove it with a cotton pad soaked in warm water. You’ll notice that some of the hair was removed. Treatment should be repeated constantly.
  1. Face mask with turmeric, milk and chickpea flour
Mix in a bowl 6 tablespoons of chickpea flour, half a glass of milk, a tablespoon of turmeric, and a teaspoon of sour cream. Allow the paste to act 25 minutes, until dry, then remove it gently with a dry towel or hand. If the dough is too soft, add more flour of chickpeas. Also, if it is too hard, add milk.
  1. Face mask with potato juice and red lentils
Mix in a bowl potato juice from 2-3 potatoes, a small bowl of red lentil puree, 4 tablespoons of lemon juice and a tablespoon of honey. After you mix all ingredients, apply the mask on your face and let it dry. Remove gently.
  1. Face mask with honey and lemon
Mix 1 tablespoon of honey and a few drops of lemon juice. Apply the mask on face and leave it for 15 minutes then remove it with a wet towel. Do not expect to remove all the hair with one mask, treatment should be repeated 2-3 times a week, the results will not delay to appear.
  1. Face mask with sugar and honey
Unlike other masks from above this one acts as a wax mask. Mix in a bowl one tablespoon of sugar one of honey and a few drops of lemon juice. Heat the mixture in the microwave for 3 minutes, and after that when the paste is cooled, but it’s still warm, apply it on the face, on the areas with hair. Try to remove the mask by pulling in the opposite direction of hair growth, just as you do with wax.
  1. Face mask with egg
Another effective remedy for facial hair removal is a mask prepared from egg whites, a tablespoon of sugar and a tablespoon of flour. The ingredients should be mixed well, and the resulting paste to be applied on the face. After it dries, it should be eliminated from the face in the same manner as wax by pulling it in the opposite direction of hair growth. This mask does not provide the same results as waxing.
Source: Link

Reshape Your Booty Easily

Reshape Your Booty Easily

Reshape Your Booty

I am sharing today one simple workout that will help you to reshape your booty. so donot loose hope, be determinant  and taste your sweat. things you need is MAT only.
Steps
  • Lie on your back with your arms at your sides with your knees bent and your feet on the floor.
  • Lift your hips toward the ceiling. Hold for 1 count, and then lower back down.
  • Repeat the lifts for 60 seconds, squeezing your glutes and hamstrings at the top of the range of motion. Be careful not to overarch your spine.
  • To make this exercise more difficult, extend one leg at the top of the lift. Keep your thighs parallel and hold the lifted position for about 5 seconds.
  • Keeping your hips up, place your foot back on the floor and then lower your hips.
  • Repeat this exercise for 30 seconds; switch sides and do the move for another 30 seconds on the other leg.
Related : 20 Tough but Effective Butt Exercises of All Time
                5 Ways To Build The Perfect Butt

DIY Blackhead Removal Peel Off Mask

DIY Blackhead Removal Peel Off Mask

Ingredients

  • 1 egg yolk
  • 1 tablespoon gelatin (here)
  • 2 tablespoons organic milk

Directions

  • Clean and Steam your face to open up the pores.
  • Beat the egg white lightly.
  • Mix gelatin and milk.
  • Heat over a gentle flame, constantly stirring, until the gelatin dissolves completely. Transfer to a bowl.
  • Let it cool. Add the egg and mix well.
  • Spread the mixture over your face and let it set for 20-30 minutes.
  • Peel off starting at the chin and moving upwards.
  • Rinse with warm water and splash with cold water to close the pores.
Related :  Remove Blackheads in a Natural Way

Source: Link

10 Fabulous at Home Hiit Workouts that Burn Fat Fast

10 Fabulous at Home Hiit Workouts that Burn Fat Fast

You Must Try Them if You are Serious enough to lose Fat

Girls with belly fat loses all their charm. Belly fat is the worst thing one can have. its always difficult to eliminate it. Determination is a key to get rid of it. Some workout and a little care in diet can ensure you a flat abs. List of  workouts that can guarantee the removal of fat
  1. Reverse Crunch
  2. Tolsana on Blocks
  3. Trace the Triangle
  4. Plank
  5. Push Ups
  6. Balancing Act
  7. Sit Ups
  8. V ups
  9. Press and Resists
  10. The Reverse Curl and Yoga


Source: Link

8 Quick Natural Remedies For Blackheads

1. Baking Soda

The antiseptic quality of baking soda makes it a wonderful method for getting rid of blackheads.
–        In a glass or ceramic bowl, mix about a tablespoon of baking soda with just a small amount of water to form a paste.
–        Apply to blackheads and let it dry (about ten minutes.)
–        Rinse with lukewarm water.
Use this remedy to remove debris from pores about one to two times per week.

Related: Soap your face with baking soda – Amazing Effects! ( Banking Soda)

2. Cinnamon

8 Quick Natural Remedies For BlackheadsCinnamon is an anti-bacterial spice that can be used to make an aromatic face mask for removal of blackheads.
–        Mix one part organic cinnamon with two parts honey to form a paste.
–        Apply a thin layer over blackheads.
–        Leave on for at least fifteen minutes.
–        Wash off with your favorite all-natural cleanser, then follow up with a moisturizer.
Use this remedy daily for best results.

Related: 10 Tummy Tightening Foods (Cinnamon)

3. Oatmeal

Oatmeal soothes irritation, removes dead skin cells, and soaks up excess oil to help clarify the complexion.
–        Using distilled water (free of contaminants), cook enough oatmeal to cover your blackheads.
–         Cool oats to room temperature before applying to affected areas.
–        Leave on for ten to twenty minutes then rinse with lukewarm water.
Use this remedy at least once per day.   For a great organic oatmeal, try these steel cut oats from Bob’s Red Mill.
4. Lemon Juice
Lemon juice contains alpha-hydroxy acid (AHA) citric acid which naturally removes dead skin, making it perfect for unstopping clogged pores.  Also, vitamin C in lemon juice is anti-oxidant and stimulates collagen production to improve skin health and reduce scarring from acne.
–        Start by washing your face with a gentle natural cleanser.
–        Squeeze about one teaspoon of juice from an organic lemon into a glass or ceramic bowl.
–        Apply to blackheads with a small cotton ball (dab, don’t wipe.)
–        Let it dry (at least ten minutes) then rinse off with cold water.  Alternately, you can leave this treatment on skin overnight.
Use this treatment as often as once per day.

Related: How to Remove Blackheads from your Nose? (Lemon)

5. Green Tea

8 Quick Natural Remedies For BlackheadsVitamins and anti-oxidants in green tea help to break up excess oil and reduce inflammation of acne-prone skin.
–        Boil eight ounces of water then remove from heat.
–        Steep two bags or a tea ball containing about two teaspoons of organic green tea for one hour.
–        Pour liquid into a glass or ceramic bowl and cool until lukewarm.
–        Dab liquid onto blackheads and let dry (at least ten minutes.)
–        Rinse with cool water, pat dry, and moisturize.
Repeat this treatment once per day.

Related: 10 Tips to Reduce Lower Belly Fat ( Green Tea)
6. Honey
Honey is both anti-bacterial and antiseptic, making it another great choice for those with acne-related blackheads.
–        Heat about a tablespoon of pure raw honey in a small jar until it is warm to the touch.  (A good way to do this is by placing the jar into a bowl of very hot water.)
–        Dab warm honey onto blackheads and let it soak in for about ten minutes.
–        Remove with a warm, damp cloth.
This treatment can also be left on overnight.  Repeat daily for best results.
*** Make certain that you are not allergic to honey before using this treatment.***

Related: Lazy Way to Lose Weight (Honey)

7. Turmeric

8 Quick Natural Remedies For BlackheadsTurmeric is an excellent anti-inflammatory and antioxidant.  While the spice used for cooking will stain skin if applied to treat blackheads, Kasturi turmeric – a non-edible variety – is non-staining.
–        Mix a small amount of Kasturi turmeric with water or coconut oil to form a paste.
–        Dab onto blemishes and let it soak in for ten to fifteen minutes.
–        Wash off with lukewarm water
While organic Kasturi can be hard to find, any local Indian market is a good place to start.
Use this treatment daily to get rid of and prevent future blackheads.

8. Epsom Salts

Epsom salts are not only great for easing sore muscles, they can also help to remove blackheads.  White most of the treatments on this list dissolve the dead skin and oil, this Epsom salt mixture actually pulls the plug out of each clogged pore so they simply wash away.
–        Start off by exfoliating around your blackheads to remove any dead skin that may interfere with this cleansing process.
–        Mix one teaspoon of Epsom salts in half a cup of hot water and four drops of iodine.
–        Stir until all of the salts are dissolved then let the solution cool until it is warm, but no longer hot.
–        Massage the mixture into skin affected with blackheads and let it dry completely.
–        Wash your face with warm water and pat dry with a clean cloth.
Use this treatment as much as you like.

Related25 Great Uses For Epsom Salt: Beauty Hacks (Epsom)

Source: Link

Build your Booty with this Leg and Butt Workout!

Build your Booty with this Leg and Butt Workout!
Ready to work the legs and butt?! Skinny Mom Founder and CEO Brooke Griffin shows you how to work those muscles in a fat-burning state using a body bar or a pair of dumbbells and a squishy ball or rolled towel. Keep your eyes peeled for Brooke’s power moves to intensify your workout when you want to. These moves will challenge and fatigue the glutes and thighs, toning them exactly how you want. Repeat this circuit up to three times.

Moves You’ll See

Plié Squat
Skater Steps or Jumps
Inner Thigh Lifts
Donkey Kicks
Romanian Deadlift
Source: Link

25 Great Uses For Epsom Salt: Beauty Hacks

1. Lawn and garden — Studies show that the magnesium and sulfur that comprise Epsom salt may help your plants grow greener, produce higher yields and have more blooms! 
2. Pedicure — Combine 1/2 cup Epsom salt and warm soapy water, then soak your feet for 5 minutes to soften skin. Remove nail polish, push back cuticles, then cut and file your nails. Soak an additional 5 minutes in a warm Epsom salt bath for super soft feet. 
3. Hair volumizer — Combine equal parts conditioner and Epsom salt. Work the mixture through your hair and leave for 20 minutes. The result? Hair full of va-va-voom and volume! 
25 Great Uses For Epsom Salt: Beauty Hacks
4. Facial scrub — This is one of my favorite Epsom salt uses. Mix 1/2 tsp of Epsom salt with your favorite cleanser; massage into skin using small circles to give your pores a deep-cleaning. Rinse your face with cool water, pat dry. This is one of the most refreshing Epsom salt uses! 
5. Relax — Create the perfect detox bath salts! Add two cups of Epsom salt to your very-warm bath water and soak for 15 minutes. You can purchase Epsom salt with lavender or eucalyptus for an extra-soothing bath experience. Be careful when standing up, you’ll find that you are VERY relaxed after your Epsom salt bath.
6. Sea salt texturizing hair spray — Combine 1 cup of hot water, 2 tablespoons Epsom salt, 1 teaspoon aloe vera gel and 1/2 tsp conditioner in a spray bottle. Spray salt mixture into hair and scrunch hair with your hand for pretty beachy-waves. 
7. Fabric softener crystals — Mix 4 cups of Epsom salt and 20 drops of essential oil to make DIY fabric softener crystals. Use 1/4 cup per load and add at beginning of wash. What a clever way to use Epsom salt, and also a way to save money!
 8. Splinter removal — Soak your finger in an Epsom salt bath for easy splinter extraction.
 9. Body scrub — After showering, massage handfuls of Epsom salt over wet skin to exfoliate the body. Get a spa treatment at home! Get more facial scrub recipes here. 
10. Exfoliation — For exfoliation, mix 2 cups of Epsom salt with 1/4 cup of petroleum jelly and a few drops of lavender essential oil. Gently massage into dry patches for smoother skin. 
11. Mosquito bites — Epsom salt can ease the symptoms of mosquito bites. Make a compress by soaking a washcloth in cold water that has been mixed with Epsom salt (2 tablespoons per cup of water), then gently apply to the bite area. This is yet another one of my favorite Epsom salt uses. 
12. Sore muscles and arthritis — If your muscles or joints ache, an Epsom salt bath is a great way to find relief. Add 2 cups of Epsom salt to your very-warm bath water, agitate the water with your hands to dissolve it then soak for 15 minutes. 
13. Tile cleaner — Mix equal parts of dish soap and Epsom salt for a super easy and effective tile cleaner. Rinse with clear water. This is one of the most frugal Epsom salt uses, a great way to save on cleaning supplies and to use a natural alternative to harsh chemical cleaners! 
14. Bedtime bath for kids — Add one cup of Epsom salt to your kids’ evening bath to help them sleep more peacefully. 
15. Headache relief — Evidence shows that that soaking in an Epsom salt bath can relieve headache symptoms. 
16. Acne — Epsom salt has antibacterial, antifungal and antiviral properties making it a fantastic natural treatment for acne. 
17. Remove odor on hands and feet — Add 3 Tablespoons of Epsom salt to 1 quart of warm water and soak your hands or feet for 15 minutes. This will makes your skin soft, your nails shine, and also help remove foul odors. 
18. Relieve constipation — Pour 8 oz. of drinking water into a glass, mix with 1 to 2 tsp. of Epsom salt and drink the mixture for immediate relief of constipation. Mixing directions are also found on most Epsom salt packages, consult your physician before trying this. 
19. Sunburn relief — Dissolve two tablespoons of Epsom salt in 1 cups of water and spray on minor sunburns. 
20. Draw out infection — For simple infections on hands or feet, soak in a hot Epsom salt bath for 10 minutes to help clear the area. Note, some staph infections are worsened by soaking in hot water, consult your physician. 
21. Cure for common cold — Did you know that Epsom salt baths can speed healing by detoxifying your body and increasing your white blood cell count? Try an Epsom salt bath the next time you feel those first symptoms of a cold. 
22. Reduce swelling — Epsom salt baths can help the appearance of bruises and reduce swelling. 
23. Deter slugs — Sprinkle a trail of Epsom salt around the area you want to be free of slugs. 
24. Blackhead removal — Mix a teaspoon of Epsom salt, 3 drops iodine and half a cup of boiling water. Dab this solution to your blackheads with a cotton ball to help naturally extract them. 
25. Insecticide — Mix Epson salt with water, add to a spray bottle and spray on plants to naturally deter insects. Wow, that’s quite a list of Epsom salt uses! 

Source: Link

12 EXERCISES FOE THINNER THIGHS

                                                          Toe squat
12 EXERCISES FOE THINNER THIGHSHold dumbbell in each hand, get in chair pose; half squat and a=engage your core and inner knees and have your upper ankles touch.
Stand up on the balls of your feet and lift your butt 5 inches. Do 15 reps

   Pick up squats
Stand with your feet at shoulder-width apart and hold a pair of dumbbells in each hand. Squat down to place the dumbbells by your feet. Stand and squat again to pick up the dumbbells, and stand again in default position. Do 15 reps

  Barbell squats
Choose the right weight and place them on the barbell. Place the barbell on your shoulders, feet at shoulder-width apart and start doing the normal squat that is, bend your knees and hips, lowering your body towards the floor as low as possible. Push your body up and do 15 reps

    Leg circles
Lie flat on the ground, legs together and palms flat on the mat. Lift your left leg towards the ceiling, fully stretched, and start drawing circles in the air while keeping the rest of the body still. Do this 5 times clock wise and 5 times anti clockwise. Switch leg and do the same, repeat this exercise for 5 times

     Leg presses
Using a leg press machine, Challenge yourself. Sit back into the seat, legs holding the weights. Press on the weights and then lower down slowly. Do this for 15-20 times.


Single-leg dead lift
Start in the standing position and then place all your weight to the right foot by slightly bending the knee. Hold a dumbbell in your left hand and then hinge forward at your hips by kicking your left leg directly back and bringing your torso to face the floor. Return foot to centre and repeat for 3 seconds before switching sides. Remember to involve the core.

9       Kettle ball swings
Hold kettle bell with both hands, keep spine neutral, hike the kettle bell your legs and use the strength from your legs and use the strength from your legs and gluteus to swing it out at chest level. Hands fully extended, hike kettle back between legs and repeat with a different arm.

      Squats

Keep shoulders relaxed and spine in neutral position. The chest should be lifted as butt should stay above the knees. A great notice should be taken on the pelvic; it should be pointed. Propel yourself into a jump. If jumping is uncomfortable, use simply raise on your toes. Hands should point up a well during the jump and as you land, move hands to your hips and lower your body into a squat. This should be done for about 15 reps

5 Ways To Build The Perfect Butt

                           1. SQUAT
5 Ways To Build The Perfect ButtOf all the bum-friendly exercises to add to your workout routine, the squat should be numero uno. True, it’s the queen exercise of butt-building, but it’s also a great movement for athleticism, flexibility, and can even tax your cardiovascular system. Joan Puli, an IFBB Bikini competitor and proud owner of a great booty has some tips for squatting. “Old-fashioned bodyweight squats that go below parallel are a great way to start your leg workout,” she says. “They’re the perfect way to make sure you concentrate on using the right muscles throughout the workout.” Before each leg workout, Joan does 4 sets of 25 reps of bodyweight squats. She focuses on squeezing the glute muscles to get them firing and ready for her heavier lifts ahead. Joan also recommends concentrating on form rather than weight. “Focus on feeling the form through all of your exercises rather than using the heaviest weight possible,” she says. “It’s important to feel that mind-muscle connection.”
2. GO “WIDE AND HIGH” 
Puzzled about how to grow your glutes without also building massive quads? Amy Luchesse delivers the “wide and high” answer. “When doing any glute-focused exercise, like squats, take a wide step forward to take the weight away from your quads. Or, if you’re doing step-ups, add more elevation. Both adjustments will add more focus on the glutes specifically.” If you’re really looking for a challenge, Amy also recommends lunging by stepping down from an elevated platform. This increases your range of motion, which will result in greater glute muscle fiber activation and growth. 
3. BUILD A GLUTE BRIDGE 
One problem Dr. Amanda Dickinson sees regularly is women who are using a regimen that neglects to correct muscular imbalances. “It’s critical to follow a workout that focuses on correcting your muscle imbalances so you can avoid running into injuries,” she explains. “Most of us spend the majority of our day sitting, which further causes the glute muscles to weaken and makes us rely more heavily on our quads and hamstrings to power through our exercises.” One of Amanda’s favorite exercises to correct this imbalance is the glute bridge. To perform this one, sit on the ground with your upper back against a bench, your knees bent, and your feet flat on the floor in front of you. Squeeze your glutes as you raise your pelvis high enough off the floor to create a straight line between your knees, hips, and shoulders. Focus on using only your glute muscles to do the work. If you need a bigger challenge, put a weight plate or loaded barbell on your hips for extra resistance. 
4. SINGLE LEG SQUATS 
Because this exercise puts your body in an unbalanced position, you’ll have to recruit often-untapped muscle fibers in order to maintain balance. This added challenge will get even the most stubborn glutes to grow. Single-leg squats are often overlooked, but they’re one of the most challenging and most effective lower-body movements around. Many people won’t be able to do one right off the bat. Hold a weight in front of you for counterbalance, grab a wall for help, or put a thin plate under your heel. 
5. DO SPLIT SQUATS 
The split squat is an excellent butt-building move. When you do it, think about pushing up from the bent-knee position through the heel instead of through the ball or toes of your foot. By shifting your weight to your heel, your center of balance will instantly move slightly backward and will better activate your glutes. To make split squats even more difficult and thus put more stress on your booty muscles, put a barbell across your back. A barbell works better than dumbbells because your body position is optimized for glute muscle recruitment.
Source: Link

BEST WAYS TO SHRINK UP YOUR MUFFIN TOP

BEST WAYS TO SHRINK UP YOUR MUFFIN TOP5 WAYS TO SHRINK UP YOUR MUFFIN TOP
Tired of that sagging side skin? Here are the top 5 exercises to help you get rid of it for good.
1.      Side crunch
Kneel on the floor to one side (left). Place your palm on the floor and slowly transfer your weight to that side. Cross one leg to the height of the hip bringing the side of the rib cage to the hip. Do this for 10 times.

2.      Bridge
There are quite a number of variations but to me, the weighted bridge is the best. This is done by placing exercise sand bags on your hip area raising the hips into the hips into the air then exhaling. Legs should be raised and feet and back kept flat on the ground. Therefore only the hips are involved and this can be done for 20 reps.

3.      Planks
These help greatly when it comes to abs because they help strengthen the muscle and also burn belly fat. Lie on the ground as if in a push up position but this time supporting your body with your fore arms. Elbows should be directly below your shoulders and body straight. Hold for as long as possible but remember to involve core and arms

4.      Mountain climber
This involves getting in the “Get set” position of athletes. Start by getting in the push up position (back, spine, butt, legs in a straight line), then lift your left leg forward and the back, do the same for the right leg and repeat this for about 15 times.

5.      Burpees

This is a sequential exercise that goes from squatting, kicking the feet back, pushing up, squatting again and lastly standing and then jumping. The sequence is then repeated for like 10 times